Information
Docmail allows account owners to set up additional users in the main account. If you have more than one branch and send recall letters for those branches in short succession, you will want to set up an additional user so that you don't have to wait for one batch of letters to finish processing before sending the next.
This guide will explain how to set up an additional user in your Docmail account and use it in NOVA.
A list of Frequently Asked Questions can be found by clicking here.
Create an additional user in Docmail
Log in to your Docmail account here, or copy & paste this link: https://www.cfhdocmail.com/live/login.
From the Admin page, click Additional users in the Account block, then click Add new user.
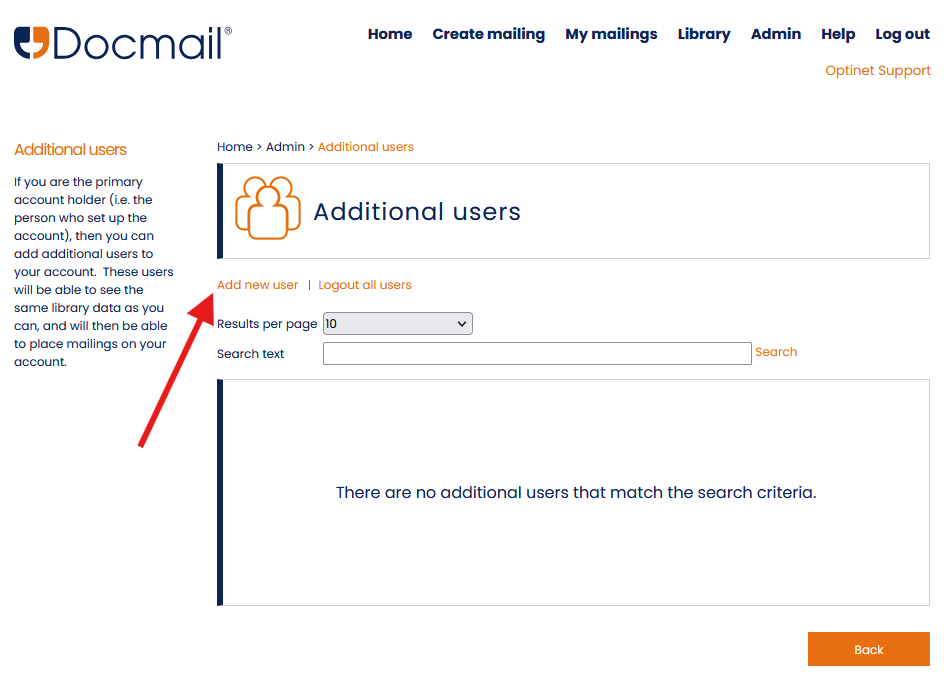
On the next page, you will be required to enter some information for the new user. Mandatory fields will be marked with an asterisk (*). It's a good idea to use your NOVA branch description as the Login User ID for easier management of additional users going forward. You can use the same email address as the parent account.
 Once you've entered all of the details, click Next and enter the password for your parent account to proceed. You will then be taken back to the overview of the additional users, and Docmail will display a message that an additional user requires an activation email to be sent. To do this, click Send activation emails.
If you will be using the same email address for the additional users, it's a good idea to send the emails one at a time.
 Click the link from Docmail Support in your inbox, and you will be prompted to create a password for the additional user. This will require a minimum of 8 characters with at least one uppercase, one lowercase and one special character.
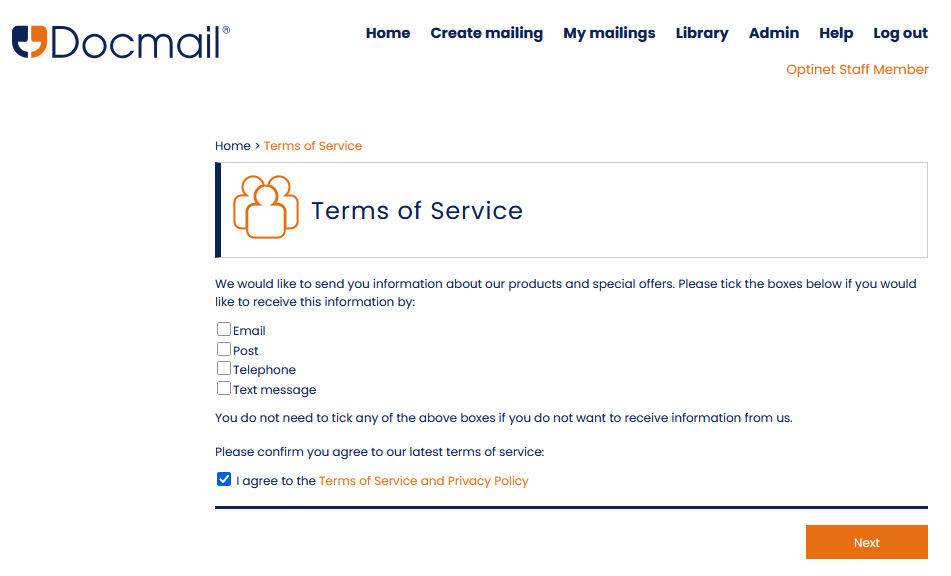
After creating the password, you will need to log in to Docmail with that additional user and agree to the Docmail Terms of Service and Privacy Policy.
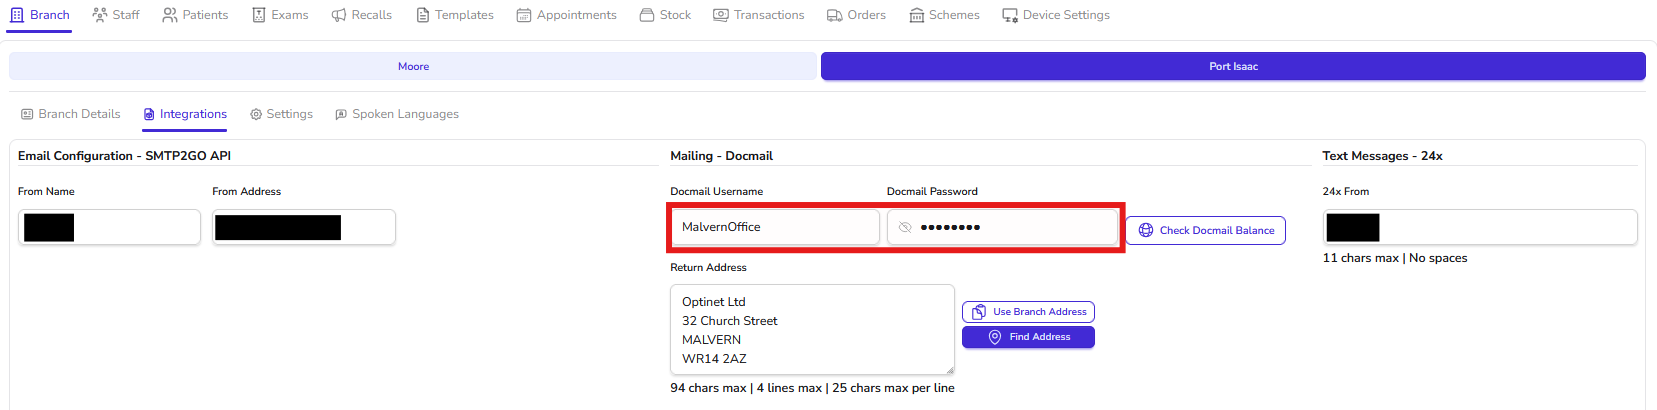
You can now add these details to the Docmail fields in your NOVA branch settings.
Log in to NOVA and navigate to Settings > Branch > your branch > Integrations, and enter the login details for the additional user. Click Check Docmail Balance to confirm the account details, then scroll to the bottom of the Settings page and click Save.
You can now send Docmail letters from multiple branches in succession without having to wait.
You will not be able to send letters from the same account before Docmail has finished processing the previous batch.
If you require assistance with any of these steps, please find our list of Frequently Asked Questions (FAQs) by clicking here.
Otherwise, please contact the Support Desk on 0800 310 2400 or support@optinetuk.com.