The options discussed on this page are found by selecting Menu --> Setup --> Appointments
The Appointments Diary is one of the most customisable parts of FLEX, therefore there are several distinct aspects to explain.
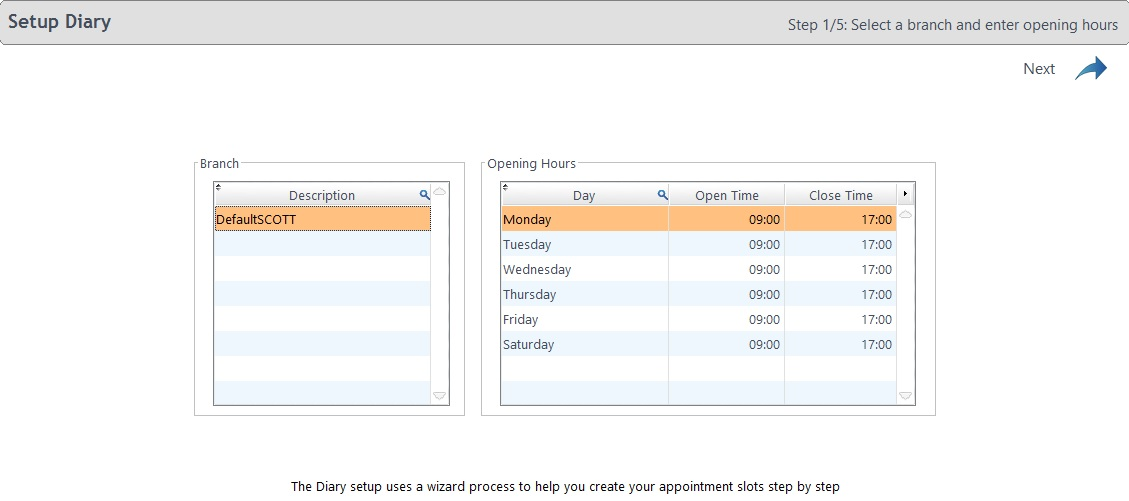
The first screen seen when the Appointments tab in the Setup menu is selected is shown below: It is the first part of a "Wizard" which helps customise the Diary step by step. However, it is worth noting that barring the "Staff Planner" tab on the top-bar (which takes you straight to step 5 of 5), all the other top menu bar buttons work independently to the wizard. Details of those buttons can be found here.
Step One

The Branch description can be updated and the Opening Hours / Days changed. Double click within the text (for example Monday or 17:00) to update the values. If you try and build appointment slots outside of your opening hours / days, it will warn you when building the diary.
Note that if you have multiple branches in the Branch column, whichever is highlighted is the one which will be updated in the upcoming steps 2 and 4. Steps 3 & 5 are 'global'.
Step Two

The Consultation Rooms can be amended in the second screen, for example some practices prefer to use Optom names, not Room names. Double click within the text (for example Oak Suite) to update the values. Double-click in the blank space below current rooms to add a new room, or un-check Active to remove from the Appointments screen. The Order of these rooms can also be set (the first one is shown closest to the left hand side in the Diary proper). If you make a room with booked appointments inactive, you will be warned.
Step Three

The Appointment Reasons can be added to and updated in the third screen. Double click into a blank cell in the Reason Description to enter a reason (for example Private Sight Test) and update the values. Bear in mind that updating any existing entries will also update all previous appointments booked for that reason! FLEX will warn you about this.
The default Length can be set here so when the reason is chosen on the diary, it will update the appointment length if necessary. Leave this column blank if it is variable. Note that before any reason is chosen when booking an appointment, it will stick to the original appointment slot length.
The Background Colour and Foreground Colour can be updated to your own preferences, and a sample of the colour combination is shown at the bottom of the screen. Tip: Do not use the same foreground and background colours!
The check-boxes Suppress ST and Suppress CL will stop a Sight Test or Contact Lens reminder being sent out when an appointment is booked. For example: if Mrs Jones has a sight test reminder due to be dispatched in three weeks time but she has come in to book an appointment, the correspondence will be suspended. The time when reminders are sent out can be customised within the Timeline setup.
NHS Warning being ticked means that when an appointment is booked before an NHS Patient is due back, it will warn the user. This setting can be customised under Setup - Branch
Prepare GOS being ticked means that when NHS forms are to be printed in a batch through the diary, appointments booked under this reason will be shown.
Set the Display Order for the order which the appointment reasons appear in the diary. Note that these will be sorted in ascending order, so don't need to be perfectly numerical.
If you want a slot to appear as non-bookable (e.g. Lunch), choose this from the drop-down in the final column. The Non-Bookable reasons can be set here
If it is an appointment reason you no longer use, tick Inactive. If you make a reason with booked appointments inactive, you will be warned.
Step Four

In the fourth screen, Staff Hours can be set. You can select when each staff member carries out each type of appointment. You can group these together to create a Staff Hour Group template. The first three columns have drop-down menus according to the Staff member and default Reason. The final three boxes are "free-text" and can be updated accordingly, but must all balance: for example 3 x 30 minute slots could fit into 90 minutes, 4 x 20 minutes would bring back an error. Create a new Staff Hour Group for each member of staff and their schedules, for example "John Mon-Fri", "John Sat", "Mandy Mon+Wed", "Mandy Tue+Fri"
Step Five

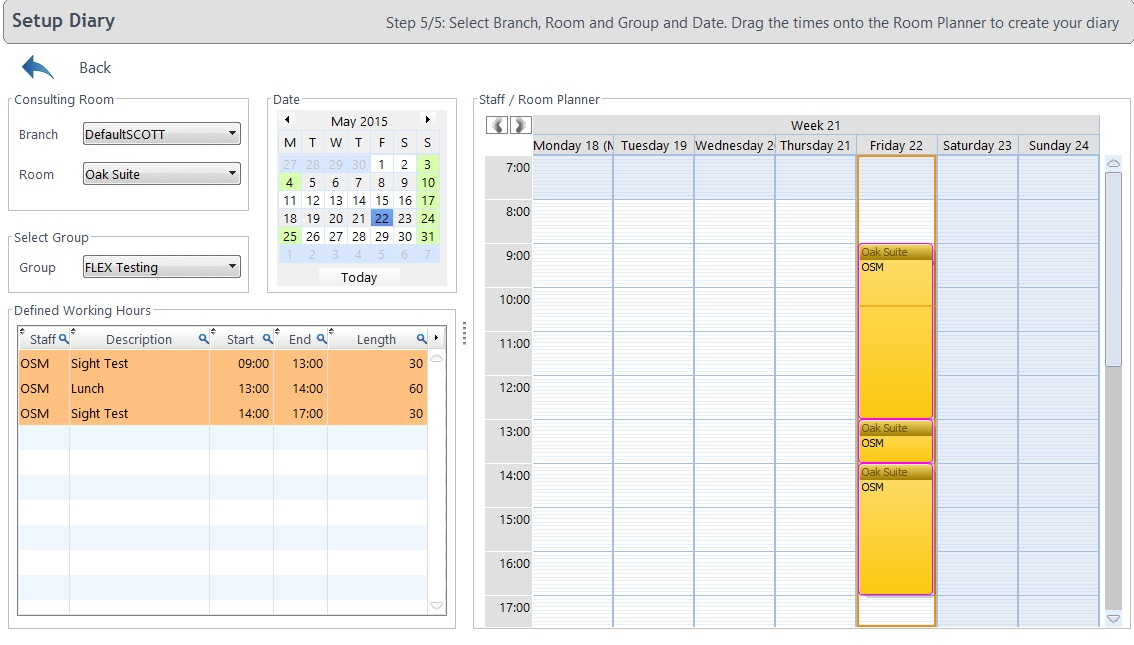
In the final screen of the wizard, all the information previously entered is combined into the Room Planner to create your diary. The Branch and Room can be chosen, the Group selected and then the Defined Working Hours dragged into the Staff / Room planner.
The dates to be filled out need to be selected using the Calendar (Date) box. Press the Shift key to select multiple dates, but be aware this may include days you are not open (e.g. Sundays). You can hold down the Ctrl key to pick individual dates, or to exclude days (e.g. Sundays).
Tip: Click on the first day to build in the Staff Planner pane on the right-hand side first, so FLEX knows where to build from.
Tip: The diary can automatically build ahead each week. In the Data tab of the Branch setup, the number of weeks to be auto-generated is set (default is 12).
