This page is only shown with the Clinical Module. Non-Clinical users should continue to the Prescription tab.
The Clinical Assessment module is used to record the examination. The Clinical Module offers a host of customisations so Optometrists can tailor their Examinations, for example the Dry Eye Assessment and Standard Eye Examination shown below, the tabs in each exam, the procedures and the dictionary items associated to them. This is covered initially on the training day, but we recommend further remote training as necessary to help with this. See the Examination Setup for more details: How Do I Update my Clinical Setup?
When the Clinical Assessment tab header is selected, it will ask which type of examination is to be conducted. Choose an exam type using the window below:
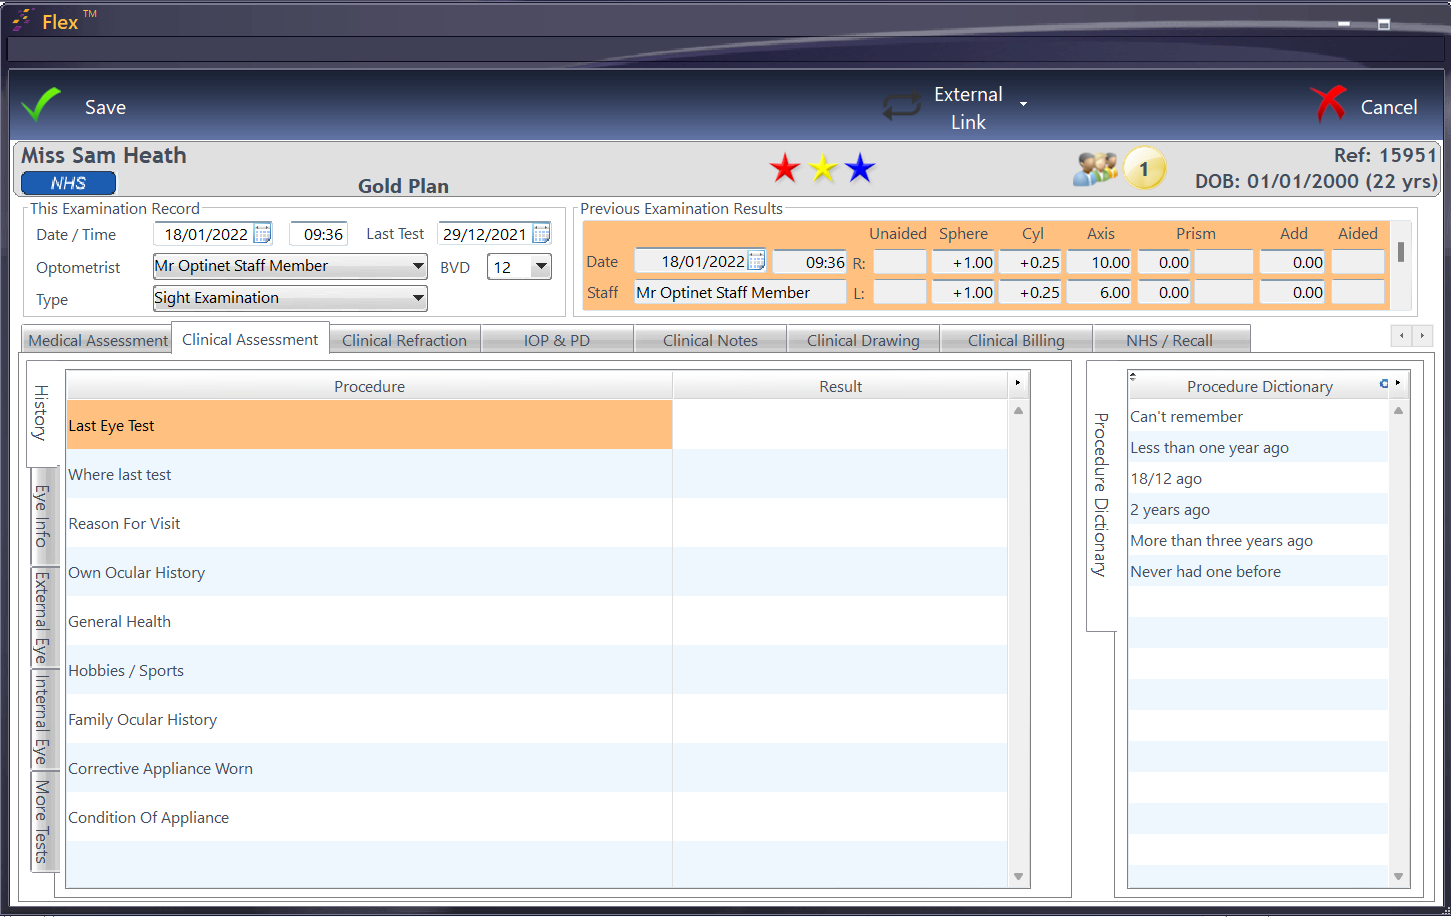
The window below will then appear (may vary slightly depending on your setup).

To enter a result, choose a result from the Procedure Dictionary. In windows with two columns, double-clicking or dragging and dropping will have the same result. For tabs with three columns (split for both eyes), double-clicking or dragging and dropping will put the result for both eyes: drag and drop into only one eye (Right or Left column) for the result to only appear in one eye.

Tip 1: Use ()DateSys or ()TimeSys as a Dictionary item to insert todays date and/or time.
Tip 2: Use ** as / in a Dictionary item to flash up for you to write your own text within it, e.g. Problems with ** vision
Tip 3: Right-click to mark clinical results as ‘Notable’, these can then be viewed in subsequent examinations. If there is notable data available, then a new button will appear at the top of the sight test examination window. This is shown below. Entries can be removed / dismissed by highlighting them (CTRL Left click to multi-select) and clicking the ‘Dismiss Selected’ button.

